20.109(F12): Mod 3 Day 5 Solar cell testing
Contents
Solar Cell Testing
Introduction
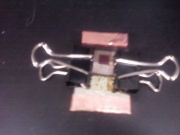
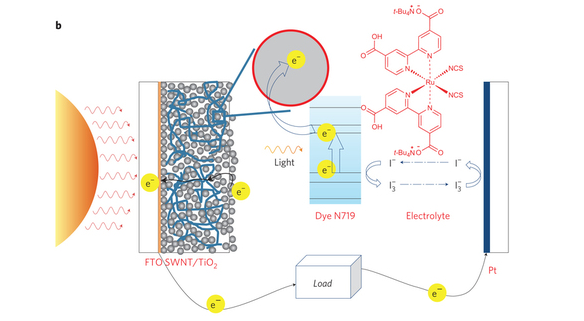
Over the first four lab sessions of this module, you have completed the anode portion of a dye-sensitized solar cell, which means that your device currently has the ability to absorb light with dye molecules and use that energy to inject electrons through a single-walled carbon nanotube (SWNT) shuttle into the start of an external circuit. However, in order for this to create electrical power, you must complete the external circuit with a counter-electrode and you must have a redox mediator that accepts electrons from this counter-electrode and recycles them back to the dye molecules. The image below represents the fully completed dye-sensitized solar cell that you'll have built by the end of today.
Once completed, you will get to test one of the most important comparative factors for all existing solar technologies, the "solar conversion efficiency;" this is a measure of the total amount of electrical power produced for a given amount of solar power shining upon the cell. It should be remembered though that many other factors of solar technologies, such as ease and cost of manufacturing, durability, and cost of materials are imperative to consider when contrasting different types of solar cells and could make impractical even those that are the most conversion efficient.
Protocols
Part 1: Completion of Assembly
While you were out: Solar cell anodes were soaked in the dye N716 and rinsed
Today's Protocol:
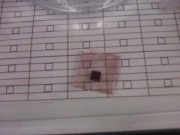
- The anode needs to be coated in a layer of Surlyn (a trademarked resin from Dupont. This ensures that the electrolyte solution is contained within the solar cell. The Surlyn comes as a bi-layered product with one layer being the resin of interest and the other being a protective layer for packaging. To remove the protective layer, place a piece of scotch tape on both sides of a pre-cut piece such that they overhang and adhere together. Now, tear the pieces of tape apart and continue tearing until the two layers separate.
- Place the piece of Surlyn on top of your anode with the pre-cut hole in it over the square of dye-coated Titania:SWNT materials you created last time. Using two clips, clip a piece of teflon on top of the Surlyn. Place this "sandwich" of materials you've made into a 100°C drying oven for 10 minutes. (This is to melt the Surlyn to the surface of the anode.)
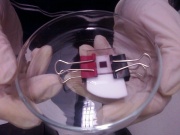
- Allow your Surlyn coated anode to cool to room temperature. To now complete the solar cell, pipette 30 microliters of Electrolyte solution, which contains the Iodide redox mediator that will recycle electrons to the dye, on top of the dye-coated square. Next, use two clips to clip a piece of Platinum sputtered glass on top of the electrolyte solution containing anode (Prior to clipping it, you should wrap copper tape around both ends of the platinum coated glass) Your completed solar-cell should look like the picture seen to the right.
Part 2: Testing of Solar Conversion Efficiency
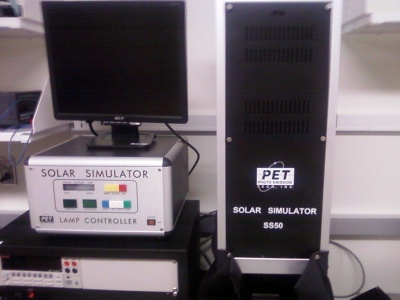
- The device above is the machine we will use to test the solar cells. Its function is to emit a programmed amount of solar energy while simultaneously testing the amount of power that an inputted solar device generates. In order to prepare your device for efficiency measurement, connect the copper coated ends of your device with the two sets of clamps hanging from the machine. One set will supply the voltage through the device while the other will measure the output current. (Make sure one of each set is on each side)
- For what may be one of the most important steps of this entire module, use a ruler to measure the area of the device (the dye coated square) in centimeters. The calculated input power is directly determined through this area measurement, so inaccurate area measurements can lead to falsely high or low efficiencies.
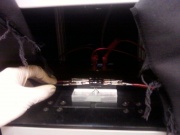
- Place your connected device into the illumination chamber so that the dye coated side is up and directly under where the light will be emitted. (See photo to the right)
- Enter your device area into the pre-programmed settings screen on the monitor and press enter. The machine should take several moments to finish the measurement process.
- Observe the outputted graph of Voltage versus Current and the efficiency of your device. How does it compare to other solar devices and to those of other groups within the class?
- As a final step output your current and voltage data into an excel file; find the maximum output power of the device by finding the current, voltage pair that are highest when multiplied together and divided by the device area.
ASSIGNMENTS
- You will present your research proposals (in writing or orally) next time!
- If you have not contributed your thoughts, comments and ideas to the 20.109 class blog, remember that you are required to post at least 300 words by midnight M3D5. Your summary statement is also almost due so review the requirements for this assignment here and then upload the final assignment to the Stellar site.

