20.109(S19):Assemble and test batteries (Day5)
Contents
Introduction
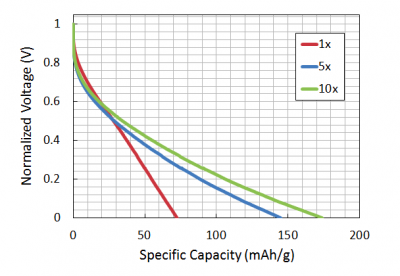
Today you will assess the data to determine how well your battery performed. Previously, you prepared a battery electrode, specifically a cathode, from Fe(III)-phage-NP nanowires that you combined with carbon. The redox properties of this active material determine the operating voltage, while other properties influence the capacity (how long the battery 'lasts' under a given current load) and rate capability (how quickly the battery is discharged or charged). Capacity and rate capability can be improved by making materials very small or by incorporating conductive metals into the matrix into the material. The goal of your research is to assess how the amount of phage used in biomineralization affects capacity.
The theoretical capacity of a battery is the quantity of electricity involved for the electro-chemical reaction within the battery. For our Fe(III)-phage batteries, the theoretical capacity is 178 mA*h/g, a value based on the reduced state of the cathode material - LiFe(II)PO4. Using this information, we can calculate the "loading factor" for the galvanostat to be 17.8 mA/g (theoretical capacity divided by the time used to charge/discharge). This is the amount of current to use for a 10 hour discharge. The discharge time is selected by the researcher. Slower discharge times are better as diffusion of the solvents is increased making it more likely that your battery will reach the theoretical capacity.
To calculate the current needed to fully charge or discharge your battery, you need to account for the mass of your cathode. The mass of every electrode will be a little different, so the charge/discharge rates will be slightly different. But as an example, if your battery cathode is precisely 1 mg of active material, then to discharge it in 10 hours we'd have to apply a negative current of -17.8 μA.
It is important to note that your cathode consists of more than just the active material. Remember that when you prepared your cathode material you used 60% Fe(III)-phage-NP nanowires, 35% Super P, and 5% PTFE...in addition your Fe(III)-phage nanowires are approximately 10% phage. To account for this, you need to adjust your cathode weight by multiplying by 0.54. Be sure to know how this value was determined!
Protocols
Part 1: Battery assembly
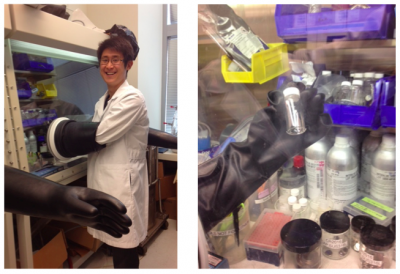
It is necessary to assemble the batteries in an argon chamber because the material we are using for the anode, lithium, is explosive when exposed to air.
Because the battery testing step requires several hours and because the assembly must be done in an argon chamber, Dr. Jifa Qi assembled and tested your batteries last week while you were away. Thank you, Jifa! Today you will see a demo of the battery assembly procedure. The steps are provided below for your notes.
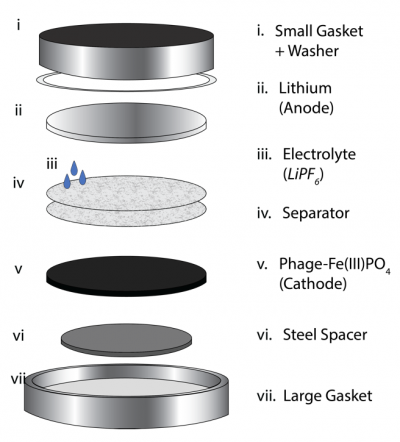
- The battery is assembled from the bottom up, so the first step is to place the large gasket such that the flat side is on the table (vii in the schematic to the right).
- Add a steel spacer to the center of the large gasket.
- The steel spacer prevents direct contact between the active material (cathode) and the probe - important when measuring battery performance. In addition, it ensures the layers are 'snug' within the gasket.
- Gently place the active material (cathode) on the steel spacer.
- Add a separator then pipet ~50 μL of EC/DMC LiPF6 (electrolyte solution).
- The separator ensures your cathode and anode do not contact and short.
- The concentrated electrolyte solution facilitates the the transfer of electrons and ions between the cathode and the anode.
- Repeat step #4.
- To prepare the anode, punch out a 9/16" disc from the lithium foil.
- Pick away the excess lithium foil with tweezers.
- If the anode disc is bent, flatten it with a roller while applying slight pressure.
- Place the excess lithium in the appropriate waste beaker.
- Lastly, add a washer to the rim of the small gasket and gently place it over the center of the battery stack.
- Use tweezers to transfer the battery stack to the crimper.
- To ensure proper crimping, place the stack in the center of the crimper.
- Crimp the battery.
- To quickly check your battery for any shortage, use the multimeter to measure the voltage. Voltages 2.0 - 4.5 V are ideal.
Part 2: Battery testing
The capacity of your battery was measured by applying constant charging and discharging current for 3 cycles (charge + discharge = one cycle). This method is called 'Constant Current Galvanostatic' testing. The theoretical capacity of your battery is 178 mA*h/g; however, like most experimental results, the actual capacity will likely deviate from the theoretical value.
To test the capacity of your battery, Jifa used the galvanostat in the Belcher lab. Today you will learn more about how this machine works and what the data mean during the demo. An overview of the process is shown below.

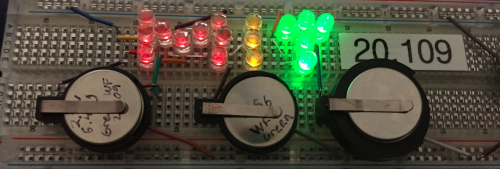
A more rapid, though qualitative, method for checking your battery involves using a circuit to light an LED. You will use this technique to check the battery that contains the cathode you constructed with your Fe(III)-phage-NP nanowires!
Part 3: Data analysis
Please find the Capacity data for your batteries here. Then, upload information (composition, cathode weight, actual capacity) about your experimental battery to share with the class in the appropriate spaces on the same page.
Reagents
- EC/DMC LiPF6
- concentrated electrolyte solution
- Lithium foil
- anode material
Next day: Research proposal presentations
Previous day: Visualize phage nanowires using transmission electron microscopy