20.109(F15):Prepare expression system (Day2)

Introduction
Now that we have prepared DNA encoding your mutant inverse pericams, we would like to produce the proteins themselves. Since the last time you were here, your oh-so devoted teaching staff transformed competent bacteria (called NEB 5α) with mutagenized DNA prepared from a template plasmid. This step conveniently carried out by E. coli amplified the DNA encoding for mutant inverse pericam. Successfully transformed NEB 5α bacteria grew into colonies on ampicillin-containing plates, and the teaching staff picked two colonies per mutant to grow in liquid culture. Lastly, the plasmids carrying the mutated inverse pericam gene were purified (as in Module 1). The NEB 5α cell line, although it now carries the inverse pericam DNA, cannot produce the inverse pericam protein. Today you will prepare for analysis DNA extracted from NEB 5α cells, and transform your IPC mutant plasmids into a new bacterial system, BL21(DE3)pLysS, that can produce the protein directly.

The bacterial expression vector we are using (pRSET) contains the bacteriophage T7 promoter. This promoter is active only in the presence of T7 RNA polymerase (T7RNAP), an enzyme that therefore must be expressed by the bacterial strain used to make the protein of interest. We will use the BL21(DE3)pLysS strain, which has the following genotype: F-, ompT hsdSB (rB- mB-) gal dcm (DE3) pLysS (CamR). In BL21(DE3), T7RNAP is associated with a lac construct. Constitutively expressed lac repressor (lacI gene) blocks expression from the lac promoter; thus, the polymerase will not be produced except in the presence of repressor-binding lactose or a small-molecule lactose analogue such as IPTG (isopropyl β-D-thiogalactoside). To reduce ‘leaky’ expression of the protein of interest (in our case, inverse pericam), the pLysS version of BL21(DE3) contains T7 lysozyme, which inhibits basal transcription of T7RNAP. This gene is retained by chloramphenicol selection, while the pRSET plasmid itself (and thus inverse pericam) is retained by ampicillin selection.

Due to time constraints the teaching faculty previously completed mini-preps to isolate your plasmid DNA and today you will prepare the DNA for sequencing analysis, as well as use it immediately for transformation. In order to transform BL21(DE3)pLysS cells with your mutant IPC plasmids, you will first have to make the cells competent, i.e., able to efficiently take up foreign DNA. With the NEB 5α strain, we used commercially available competent cells that did not need further treatment prior to DNA addition. Today, you will make chemically competent cells yourself using calcium chloride, then incubate them with plasmid DNA and heat shock them as before prior to plating. Whether prepared by a company or by you, remember that competent cells are extremely fragile and should be handled gently, i.e. kept cold and not vortexed. Bacterial transformation is efficient enough for most lab purposes, resulting in as many as 109 transformed cells per microgram of DNA, but even with highly competent cells only 1 DNA molecule in about 10,000 is successfully transformed.
After today's lab session, the teaching staff will pick colonies and set up liquid overnight cultures from your transformed BL21(DE3)pLysS cells. Next time, you will add IPTG to these liquid cultures to induce expression of your mutant proteins, which you will then isolate and characterize. Much of this process is summarized in the figure above.
Protocols
Part 1: Prepare competent BL21(DE3)pLysS cells
- Pick up one 5 mL tube of BL21(DE3)pLysS cells. These cells should be in or near the early- or mid-log phase of growth, which is indicated by an OD600 value of 0.4-0.8.
- Measure the OD600 value of a 1:10 dilution of your cells (use a total volume of 650-700 μL). If the cells are not yet dense enough, return them to the rotary shaker in the incubator. Remember to balance with another tube! As a rule, your cells should double every 20-30 minutes.
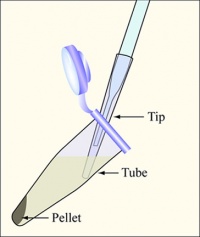 Aspirate the supernatant, as shown, removing as few cells as possible
- Once your cells have reached the appropriate growth phase, aliquot them into 3 eppendorf tubes each containing 1.5 mL culture volume. Spin for 1 minute at max speed (~16,000 rcf/13,000 rpm), aspirate the supernatants as shown, and resuspend in 1.5 mL of ice-cold calcium chloride (100 mM). Note: you can balance these tubes in the centrifuge with three-way symmetry.
- You may find it easiest to resuspend the cells in a small volume first (say, 200 μL), then add the remaining volume of CaCl2 (e.g., in two steps of 650 μL) and invert the tubes to mix.
- Spin again for 1 minute. The resultant pellets should occur as streaks down the side of the eppendorf tube, so be very careful not to disturb the cells when aspirating.
- This time, resuspend each pellet in 100 μL of CaCl2, then pool the cells together in one tube.
- Alternatively, resuspend the first pellet in 300 μL, then use this cell solution to resuspend the next pellet, and the next.
- Incubate on ice for 1 hour. You can work on parts 2 and 4 of today's protocols now, as well as assemble the materials for part 3. Among other things, be sure to label four eppendorfs and pre-chill them on ice. The labels should indicate a (-) no DNA control, a (+) wild-type IPC transformation control (with minipreps prepared and vetted by the teaching staff), and your two mutant candidate transformations (X#Z -1 and -2).

Part 2: Prepare DNA for sequencing reactions
As you learned during Module 1, amplification reactions require a primer for initiation. Primers are also needed for sequencing reactions. Legible readout of the gene typically begins about 40-50 bp downstream of the primer site, and continues for ~1000 bp at most. Thus, multiple primers must be used to fully view genes > 1 kbp in size. How many basepairs long is inverse pericam? (Refer to this ApE file.) Luckily, we only care about the back end of IPC, i.e. the part containing calmodulin, and therefore only need two primers to confirm our mutations: one primer will sequence in the forward direction and the second in the reverse direction to ensure complete coverage of the CaM gene.
The primers you will use today are below:
| Primer | Sequence (5' - 3') |
|---|---|
| IPC_F | GTC CAG GAG CGC ACC ATC TTC |
| IPC_R | GGC CCC AAG GGG TTA TGC |
Use your APE file of IPC from M2D1 to determine where these primers anneal within the sequence. How many basepairs upstream and downstream of CaM do IPC_F and IPC_R, respectively, anneal?
The recommended composition of sequencing reactions is ~800 ng of plasmid DNA and 25 pmoles of sequencing primer in a final volume of 15 μL. The miniprep'd plasmid should have ~300 ng of nucleic acid/μL but that will be a mixture of RNA and DNA, so we will estimate the amount appropriate for our reactions.
Because you will examine the sequence of your potential mutants with both the IPC_F and IPC_R primers, you will need to prepare two reactions for each candidate. Thus you will have a total of four sequencing reactions. For each reaction, combine the following reagents directly in the appropriate tube within the 8-PCR-tube strip, as noted in the table below:
- 6 μL nuclease-free water
- 4 μL of your plasmid DNA candidate
- 5 μL of the primer stock on the teaching bench (the stock concentration is 5 pmol / μL)
- Please add the forward primer to the odd numbered tubes and the reverse primer to the even numbered tubes (i.e. tube #1 contains mutant #1 plasmid DNA and IPC_F primer, tube #2 contains mutant #1 plasmid DNA and IPC_R primer, etc.).
The side of each tube is numerically labeled and you should use only the two tubes assigned to your group. The teaching faculty will turn in the strips at the Genewiz company drop-off box for sequencing.
| Group | Tubes |
|---|---|
| Red | 1-4 |
| T/R Orange or W/F Yellow | 5-8 |
| Green | 9-12 |
| Blue | 13-16 |
| Pink | 17-20 |
Part 3: Transform BL21(DE3)pLysS with mutant DNA
- Prewarm and dry 4 LB+Amp+Cam plates by placing them in the 37 °C incubator, media side up with the lids ajar. You will perform one transformation for each of your four samples (1 wild-type IPC, 2 mutants, and 1 no-DNA negative-control transformation).
- When your competent cells are ready, aliquot 70 μL of cells per pre-chilled eppendorf.
- Add 2 μL of the appropriate DNA to each tube. Remember, you are testing plasmid DNA that was prepared from two different colonies for your X#Z mutant, along with DNA from a colony that amplified the pRSET-IPC wild type. You will also perform a no DNA control.
- Flick to mix the contents and leave the tubes on ice for at least 5 minutes.
- Heat shock the cells on the 42 °C heat block for 90 seconds exactly and then put on ice for two minutes.
- Move the samples to a rack on your bench, add 0.5 mL of LB media to each one, and invert each tube to mix.
- Incubate the tubes in the 37 °C incubator for at least 30 minutes. This gives the antibiotic-resistance genes some time to be expressed in the transformed bacterial cells.
- While you are waiting, label 3 large glass test tubes with your team color and sample names.
- Normally we would have you combine LB culture broth with both ampicillin and chloramphenicol, and then aliquot 2.5 mL of this mixture per tube. Due to the long break before your colonies are actually picked, we will do this part for you closer to M2D3.
- Also prepare 4 eppendorf tubes containing 180 μL of LB each. You will use these to dilute your transformed cells 1:10 when you retrieve them from the incubator.
- If you label these tubes with stickers rather than directly on the cap, you can then transfer each sticker to the appropriate plate as you go, saving one labeling step.
- Note that we are reducing the cell concentration because miniprep DNA is much more concentrated than the DNA resulting from mutagenesis; it also does not require repair, further increasing the transformation efficiency.
- Plate 200 μL of each (1:10 diluted) transformation mix on an LB+Amp+Cam plate.
- Safety reminder: After dipping the glass spreader in the ethanol jar, then pass it through the flame of the alcohol burner just long enough to ignite the ethanol. After letting the ethanol burn off, the spreader may still be very hot, and it is advisable to tap it gently on a portion of the agar plate without cells in order to equilibrate it with the agar.
- Once the plates are done, wrap them with colored tape and incubate them in the 37 °C incubator overnight. One of the teaching faculty will remove them from the incubator and set up liquid cultures for you to use next time.
Part 4: Count mutant colonies
When you have a spare moment today, count the colonies that arose on the NEB 5α cells transformed by the teaching faculty for your team, as well as on the positive and negative control plates. Does the negative control have any colonies? How does your mutation efficiency compare to that of the positive control? Please put your colony counts on today's Discussion page.
Part 5: Journal article discussion
The purpose of this discussion will be two-fold: 1) to familiarize ourselves with the history of protein design, and 2) to continue to explore ways of talking about the scientific literature.
If you chose to read the paper by Heim, Prasher, and Tsien, consider the following questions.
- What are the advantages of GFP compared to synthetic fluorescent dyes, and what are its limitations? Which of these limitations are Heim et al. trying to address?
- What methods did the authors use for mutagenesis, and how do they compare to the method we are using?
- How were mutagenic proteins initially selected, and how were the chosen ones further analyzed?
- What is the significance of the different wild-type protein fractions shown in Figure 1?
- If GFP maturation does not require any cofactors for a chemical reaction, why does it take four hours? What lines of evidence suggest the absence of cofactors?
- In what part(s) of the protein were useful amino acid substitutions found?
We will not have the opportunity to discuss these questions as a class, but feel free to ask the teaching faculty any questions you may have concerning the journal article.
You should be familiar with the whole Nagai et al paper, but your team will only be asked to explain/describe the portion assigned below. Use the questions associated with your section to guide you as you prepare for the group discussion.
- GROUP DISCUSSION Introduction, Methods (gene construction) and Figure 1
- Consider: What is a chimeric protein? A circularly permuted one?
- How does the chimeric protein pericam work as a sensor? (No need for details about different types of pericams yet.)
- Briefly summarize how pericam was constructed at the gene level. What changes had to be made to express pericam in mammalian rather than bacterial cells?
- T/R RED TEAM and W/F BLUE TEAM Figure 2
- What do the authors learn about cpEYFP structure from the absorbance spectra?
- Compare the wavelength used for testing pericam with the excitation maximum of cpEYFP. Why might they be slightly different?
- Besides making the critical mutations shown in Table 1, what did the authors have to do to make a working (fluorescent, calcium-sensitive) pericam?
- What was the dynamic range (intensity change with calcium addition) of the first working cpEYFP?
- T/R ORANGE TEAM and W/F YELLOW TEAM Table 1 (mutations) and Figure 3, A-I (focus on D-F)
- Describe the three types of pericam initially constructed and tested and how they respond to calcium.
- What kinds of amino acid substitutions were made, and why might they cause the noted effects?
- T/R BLUE TEAM and W/F GREEN TEAM Table 1 (Kd) and Figure 3, J-L
- This set of figures is very similar to the one you will eventually create for your lab reports. It is not described at length in the text, so take a moment to decipher the axes and results as best you can, using outside resources if necessary.
- T/R GREEN TEAM and W/F RED TEAM Figure 4 and Figure 5
- How does flash-pericam improve upon previous limitations to imaging calcium in the nucleus and cytosol?
- What chemicals can be used to create step-changes in intracellular calcium, and how might they work?
- How did the authors calibrate calcium levels?
- Compared to the other pericams, what's special about the way split-pericam functions?
- What are the limitations of using split-pericam as a calcium sensor?
- PINK TEAM Figure 6
- What modifications were made to pericam for organelle-level study, and how does the use of pericams improve upon previous procedures?
- What were the authors able to learn about calcium transients in different organelles?
- GROUP DISCUSSION Wrap-up
- Describe some other (not pericam-based) calcium indicators.
- How does FRET work, and what are the pros/cons of using FRET-based sensors?
Finally, you should all consider the similarities and differences between the research described in the paper above and the research that you are undertaking in this module.
Reagent list
Microbial work
- 100 mM CaCl2, sterile
- LB (Luria-Bertani broth)
- 1% Tryptone
- 0.5% Yeast Extract
- 1% NaCl
- autoclaved for sterility
- Ampicillin: 100 mg/mL, aqueous, sterile-filtered, store at +4 °C
- Chloramphenicol: 34 mg/mL in ethanol, store at -20 °C
- LB+AMP+CAM plates
- LB with 1.5% agar and 100 μg/mL Ampicillin and 34 μg/mL Chloramphenicol
Next day: Induce protein expression and evaluate DNA